

‘James Bond Island’ by Jo@net on Flickr
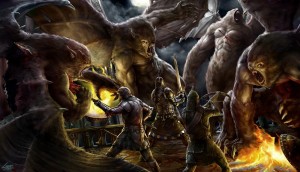
The Shattered World: a planet of islands and adventure. This is a world where merchant fleets employe battle wizards to fight off kraken and pirates, while three distinct empires struggle to dominate hundreds of islands.
I’m currently developing the Shattered World as a complete setting, that I’ll publish as an extensive ebook later this year. The Survivor’s Guide to the Shattered World (working title) will guide players through the major monsters, factions, foes, allies, and locations throughout the world.
I’ll also publish a large percentage of the Shattered World’s content on this blog over the next few months. I’ll polish the material a bit more for the ebook, but you should have a very good idea of its content before you start.
Plus, all of the content I post here should be mostly plug-and-play into your favorite fantasy RPG system.
And now, a primer on this world:
7 Things To Know About The Shattered World
- This world is mostly ocean. The central continent, Iziz, is the largest land mass, and islands are clustered around it in decreasing density as one travels further from Iziz. Many people live on the sea, as pirates or members of fleet kingdoms.
- Three empires struggle for dominance. The Empire of Shadow, a magical theocracy of mystery and experimentation, controls Iziz. The Silver Shield League is a fierce, growing empire to the southwest of Iziz. The Charter Confederacy is metaphorically caught in the middle, a squabbling alliance of islands determined to stay free to the north of Iziz.
- The gods are separate, but near. Gods speak to humans directly through dreams and visions, giving their chosen ones magical power in return for completing the gods’ tasks. The gods have never yet physically manifested on this world.
- Dragons are real, and bestial shadows of their former glory. Dragons were once a proud, powerful race that helped the humanoids escape their slavery under the Old Ones. After a massive plague, the dragons are now little more than talking beasts, jealously guarding their underground hoards. Some dragons may have escaped to other planes of existence.
- This is a world of action and ancient treasure. While there’s plenty of political intrigue within the empires, this is a world where physical action is most rewarded. Regional armies attack each others’ borders, brigands watch the highways, pirates without number sail the oceans, and adventurers find heaps of gold in abandoned keeps.
- Racial equality. While there are distant historical hints that the different humanoid races were created by the Old Ones for specific tasks (like dwarves for mining), they were all united in hatred of their masters. The War of Claw and Fire forged them into metaphorical siblings. Since then, surviving the Shattered World has kept the races together, and there is no prejudice between the major races of humanoids. However, the races are not sexually compatible, so families and small tribes are almost always of the same race.
- Magic is mysterious. In the distant past, the dragons taught the humanoids magic. Some humanoids ascended into godhood and now offer divine power directly to mortals. Magic remains wild, powerful, and strange.


!['Come sit beside me [grain]' by spaceshoe on Flickr](http://blog.brentnewhall.com/wp-content/uploads/2012/11/5056994802_94674bc556_b-297x300.jpg "'Come sit beside me [grain]' by spaceshoe on Flickr")


